■MariaDB(MySQL)をインストール
ブログ(WordPress)を導入する前に、動作条件となるデータベースMariaDB(MySQL)を導入しておきます。
CentOS7よりMySQLがMariaDBに置き変わりましたが、上位アプリにとっては、違いは無いようです。
MariaDBクライアントとサーバーをインストール。バージョン確認。
# rpm -qa | grep maria
mariadb-server-5.5.52-1.el7.x86_64
mariadb-libs-5.5.52-1.el7x86_64
mariadb-5.5.52-1.el7.x86_64
MariaDBサーバーを起動します。
MariaDBサーバーを自動起動設定、確認。
# systemctl status mariadb.service
MariaDB初期セットアップコマンドmysql_secure_installationを実行し、管理者パスワード等を設定します。
# mysql_secure_installation
NOTE: RUNNING ALL PARTS OF THIS SCRIPT IS RECOMMENDED FOR ALL MariaDB
SERVERS IN PRODUCTION USE! PLEASE READ EACH STEP CAREFULLY!
In order to log into MariaDB to secure it, we’ll need the current
password for the root user. If you’ve just installed MariaDB, and
you haven’t set the root password yet, the password will be blank,
so you should just press enter here.
Enter current password for root (enter for none):[enter]
OK, successfully used password, moving on…
Setting the root password ensures that nobody can log into the MariaDB
root user without the proper authorisation.
Set root password? [Y/n][enter]
New password:[パスワード入力]
Re-enter new password:[パスワード入力]
Password updated successfully!
Reloading privilege tables..
… Success!
By default, a MariaDB installation has an anonymous user, allowing anyone
to log into MariaDB without having to have a user account created for
them. This is intended only for testing, and to make the installation
go a bit smoother. You should remove them before moving into a
production environment.
Remove anonymous users? [Y/n][enter]
… Success!
Normally, root should only be allowed to connect from ‘localhost’. This
ensures that someone cannot guess at the root password from the network.
Disallow root login remotely? [Y/n][enter]
… Success!
By default, MariaDB comes with a database named ‘test’ that anyone can
access. This is also intended only for testing, and should be removed
before moving into a production environment.
Remove test database and access to it? [Y/n][enter]
– Dropping test database…
… Success!
– Removing privileges on test database…
… Success!
Reloading the privilege tables will ensure that all changes made so far
will take effect immediately.
Reload privilege tables now? [Y/n][enter]
… Success!
Cleaning up…
All done! If you’ve completed all of the above steps, your MariaDB
installation should now be secure.
Thanks for using MariaDB!
#
■PHPのライブラリを追加インストール
PHPは導入済みであるが、MySQLデータベース関連のライブラリを追加導入
画像ライブラリを導入
PEARライブラリを導入
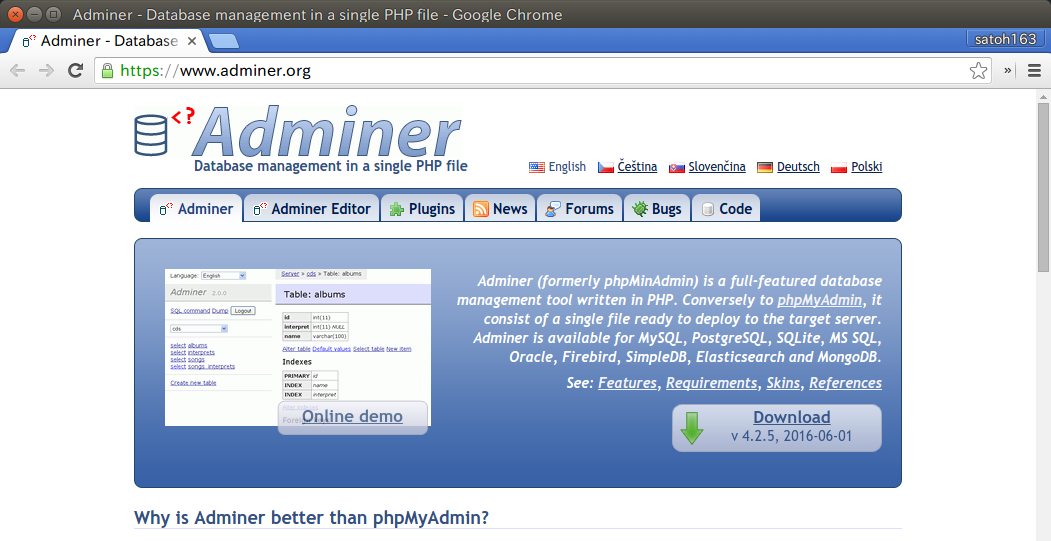
■Adminerをインストール
 当初、MySQLデータベースをブラウザ上のPHPプラグラムで扱える管理ツールとして phpMyAdmin を導入しようとしたのですが、エラーが表示され完了せず。
・・・何とかならないか調べましたが、時間ばかり流れ、ほとほと嫌気が差してきたので導入を断念。
・・・たまには、サッサとあきらめるのも吉。
・・・とは言え、コマンドで行うのも難儀です。
・・・代替ツールがないか検索してみたら、同等の機能を持つ「Adminer」に辿り着いたので、今回はこれを設置してみることにしました。
クライアントPCで、以下のサイトを開きます。
Adminer – Database management in a single PHP file
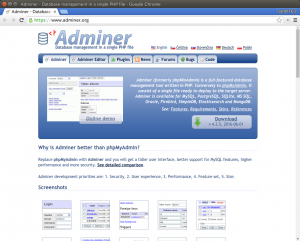
「Download」ボタンをクリックすると、同じページのDownloadのアンカーへ移動します。
今回は、最上部の「Adminer 4.2.5 (.php, 414 kB)」をダウンロード。
単一のphpファイルなので、ファイル名をadminer.phpに変更し、適当なディレクトリに入れ、FTPでサーバーにアップします。今回は、/var/www/html/_adminer/adminer.php に設置しましたが、実際の運用時は「作業後に削除」し、サーバーに存在しない状態にするか、推測されにくいディレクトリ名/ファイル名に変更する等のアタック対策が必要。
ブラウザで表示します。
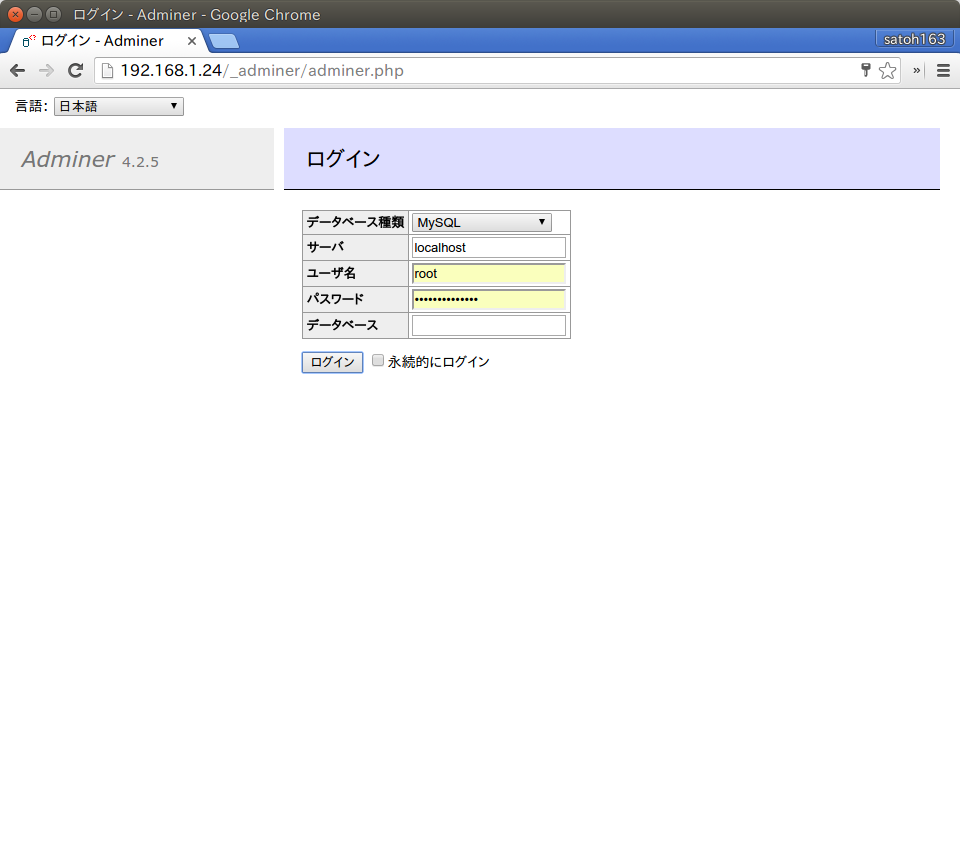
サーバにlocalhost、ユーザ名にroot、パスワードにrootのパスワードを入力しログインします。
(データベースは入力の必要なし。)
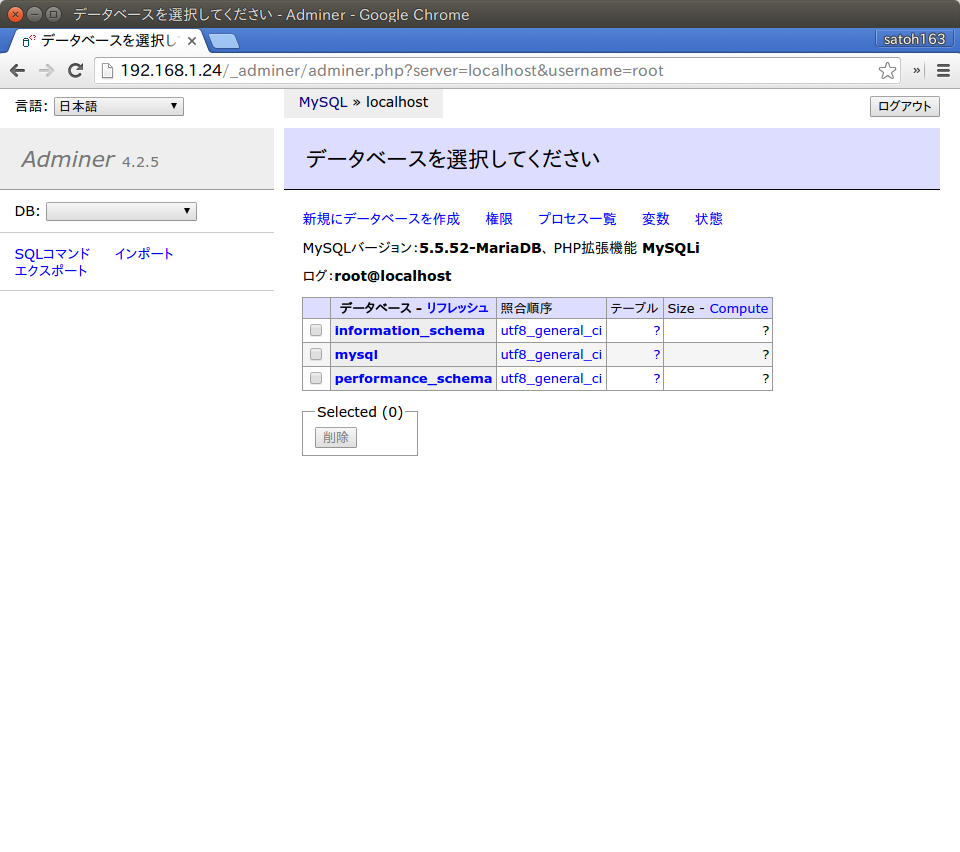
ログアウトは、右上の「ログアウト」ボタンから。
とりあえず、本日はここまで。